Flutes have always interested me. A somewhat very simple instrument and yet very versatile and complex. They are among the oldest instruments that have accompanied us humans through most cultural epochs for thousands of years.
By chance I stumbled across a vague guide on how to build a flute yourself during my research for an other carving project – with the simplest of means directly in nature. The perfect project for the next outdoor trip.
I never learned an instrument and later in life I somehow felt that it was already too late for that and I didn’t pursue that idea any further. But never say never, right?
Without much idea what to expect, it was immediately clear that this would be my next project. Of musical instruments, scales and music in general, let alone sheet music, I only had the idea that was left over from the long-gone music lessons at school – so really not much.
Accordingly, my initial expectations were very low as far as the outcome of this project was concerned: to carve a flute with simple means that can produce sounds, first of all it doesn’t matter which ones. At that point, I would have already counted it as a success to get that far.
Recently I went on an outdoor trip to a nearby nature park in my area for a few days. Besides a few other projects and mushroom foraging excursions, this was of course the perfect time for my flute venture. The research could begin.
Choose the right wood
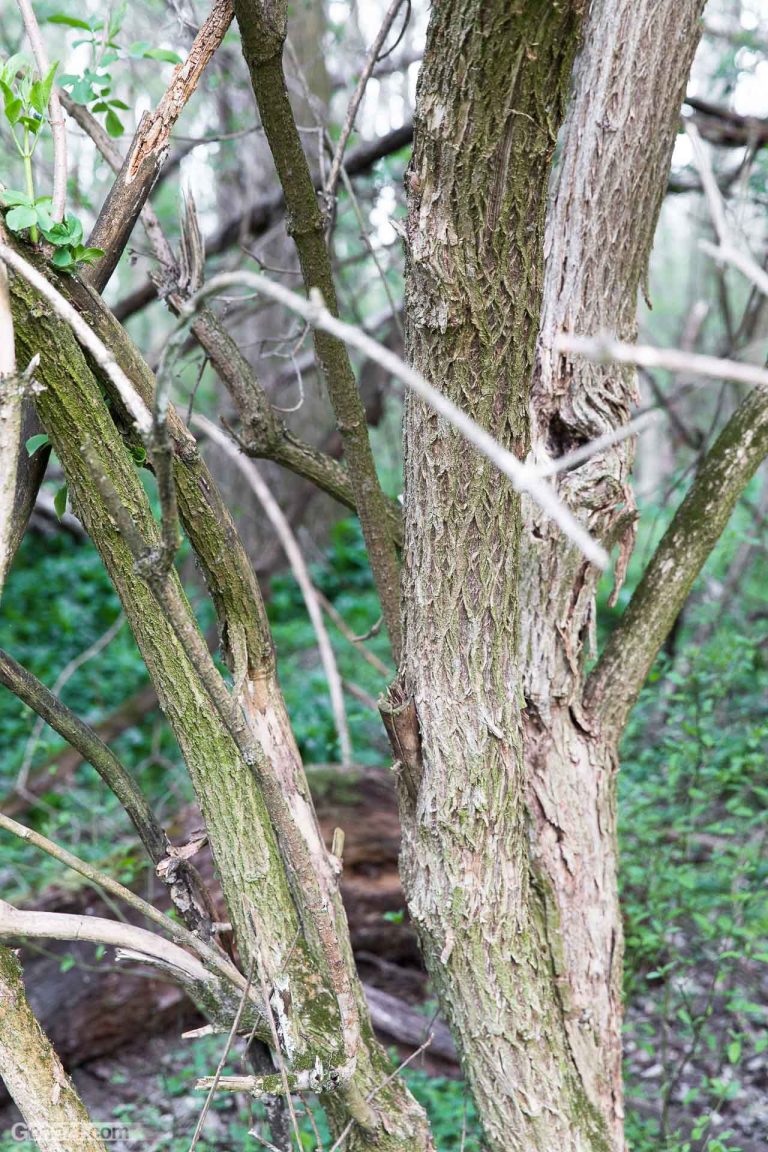
As a Central European, it quickly became clear that the best wood for my needs was a branch of elderberry (Sambucus nigra). This tree is known to most of us for the fragrant white elderflowers and black berries that are used to make tasty juice and other treats.
In North America, river cane, a type of bamboo, is often used to make flutes. However, this plant is not native to us and elderberry is also ideal if you know how to use it.
So the first task was set: to look for a suitable piece of elderberry. What luck that I was actually in an elder forest that spread along the shore areas and trailsides in pioneer style. Relatively naïve and without in-depth research, I looked for a branch that seemed somehow suitable to me. As it turned out in the course of the further project, that was of course not the best approach. I chose the elder wood too short and too thin, which also produced sounds but didn’t really sound satisfactory. So the initially low demands quickly increased 😉
I’ll spare you the details of all these errors here. In any case, the conclusion for me was back to the start and again from the beginning. So that you don’t make my mistakes in the first place, here are the most important insights into the basic dimensions of the elder branch.
We use elder wood for our project
The piece should have at least 30cm length between the growth nodes.
10 cm should be taken into account on one side for the mouthpiece.
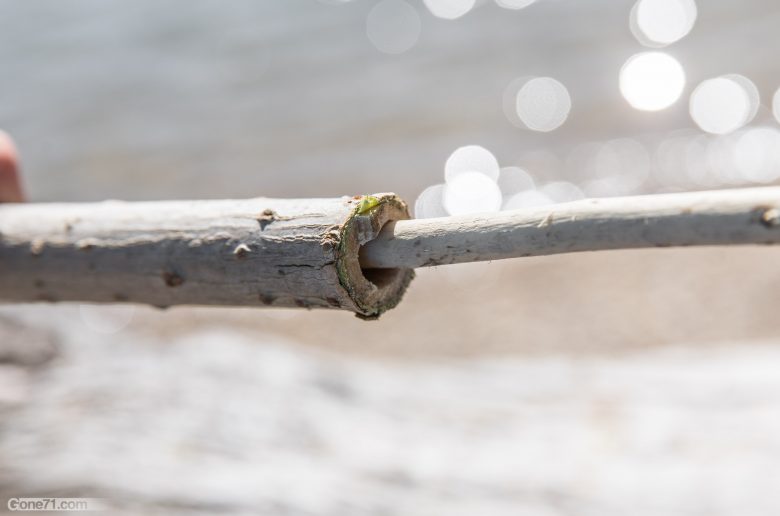
The inner diameter should be at least 15mm. With these dimensions, a flute tuned around “G” can be made.
If you want the tuen (key note) of the flute to be lower you need a longer branch with bigger diameter.
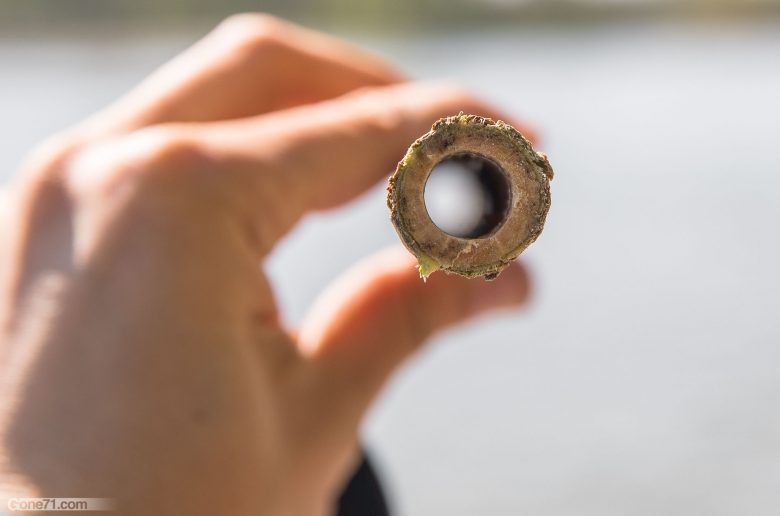
Finding elder branches of the right length was relatively easy. However, I had big problems in my area to find the corresponding inner diameters. Along a forest path, the edges of the path had just been cut out by the forest management and hundreds of elder bushes had been cut down the middle, which gave me an excellent overview of the different cross-sections. Unfortunately, the soft inner part of all of them was much too thin and not a single branch of the hundreds of plants was actually usable. A hard setback for now. After a very long search, I finally found a suitable piece of elderwood in a remote area. Maybe it was the time of year (spring), in any case it was a difficult task despite the mass of elderberry trees.
The thickness of a branch says nothing about the strength of the soft styrofoam inner part.
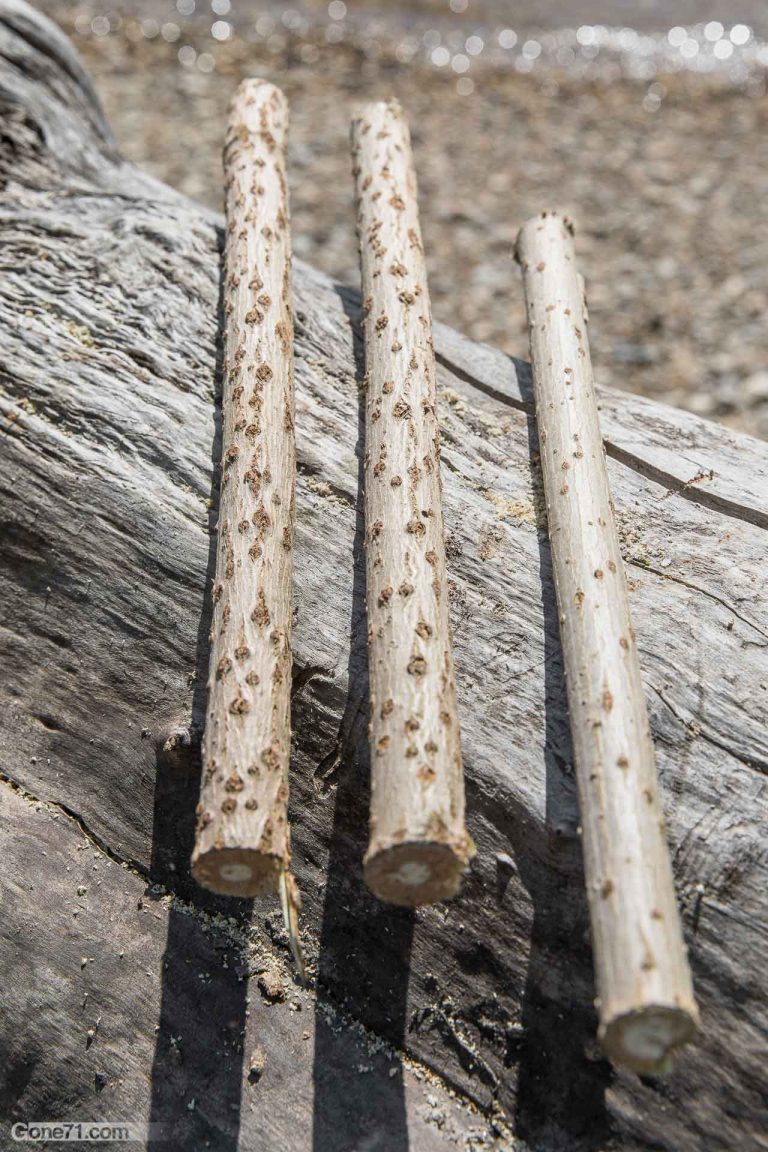
However, old branches with a pronounced bark have much less of the soft interior.
Most suitable are fresh branches that still have a very smooth, silky surface and where the bark is still very thin and shiny.
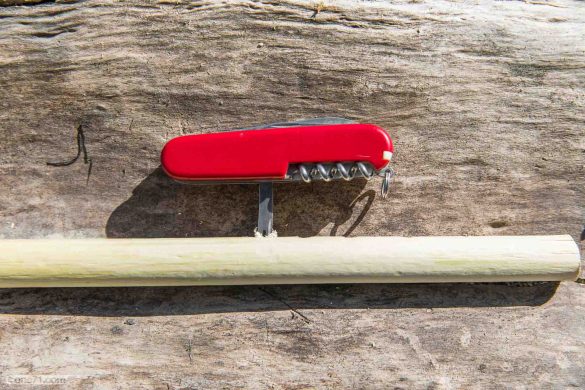
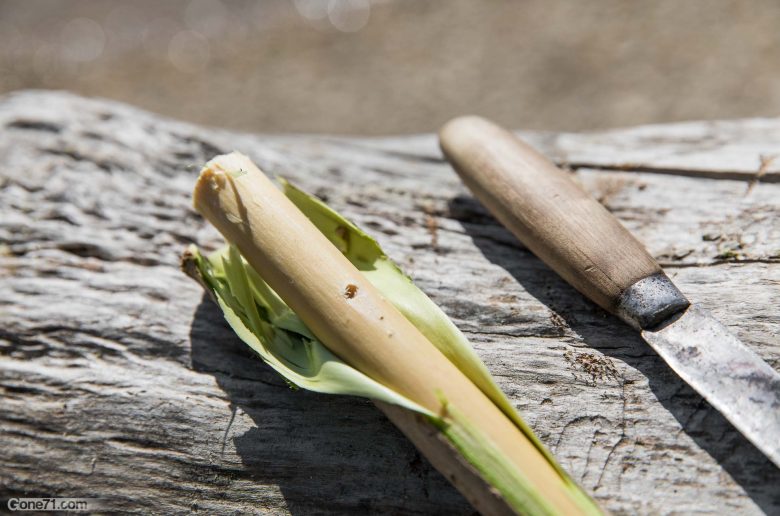
So the wood was found. Now it was time to hollow it out. I drilled out the soft inner part with a thin stick. This is very easy at the beginning, but becomes increasingly difficult the further you get to the middle. Compared to finding the right wood, it is a very simple task though. Carving a notch at the tip of the branch will make drilling easier. In between don’t forget to tap out the loosened inner material.
If the branch has been roughly hollowed out, you still have to do the fine work and try to smooth the inner walls as well as possible. To do this, it is best to cut the stick straight off and scrape off the inside walls with it.
Carve out the branch with a stick. A notch at the tip facilitates the drilling process.
Finally, make the inner walls as smooth as possible. Use a stick with a straight cut surface.
Separation of the air chamber and the sound chamber
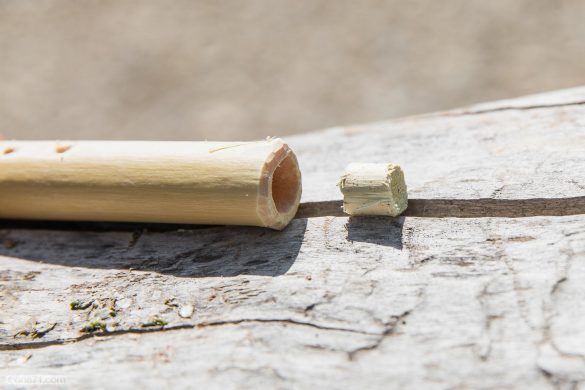
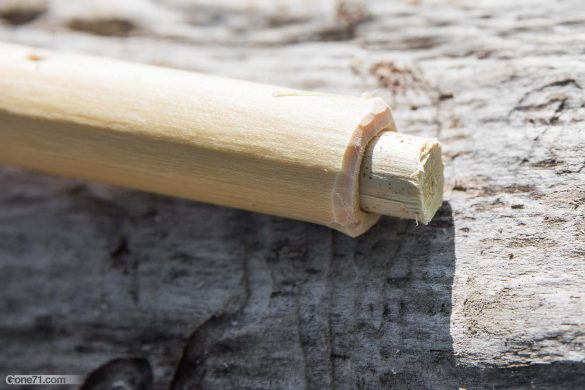
Once the branch is hollow, you can vaguely imagine a flute. Whether you leave the bark on or peel it off is a matter of taste. Doesn’t affect performance though. Now it’s a matter of separating the air chamber and the sound chamber from each other. The separation occurs where the branch node is located. For this purpose, the prospective flute is closed with a wooden plug that is inserted into the hollow branch at the desired point.
You simply choose a suitable stick or piece of wood and carve it in such a way that it can be inserted exactly up to the knot point and fixed there. Then you cut off about 1cm and insert it. The branch is a bit thinner at the node point, which is why you shouldn’t have any problems getting the wooden plug to the desired location. It should no longer be possible for air to blow through.
Find a branch that you carve so that it can be inserted up to the knot.
Cut off about 1 cm from it and make a barrier between the air chamber and the sound chamber.
Making the Sound hole and the Air hole
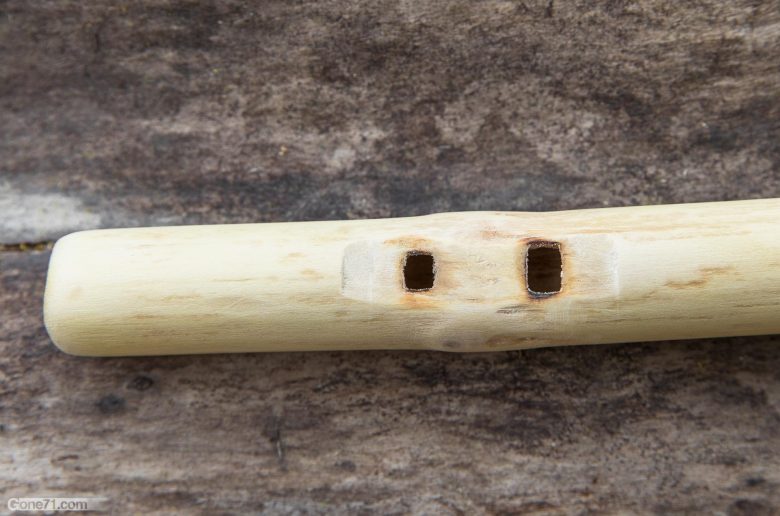
The next step is to drill a small hole just before and just after the plug. The hole at the longer end is called sound hole or actually the “True Sound Hole” (TSH) and, as the name suggests, is producing the sound. The air is blown into the air chamber via the mouth opening and goes from there via the “Air Exit Hole” and the air bridge to the sound hole where it produces the sound.
Round or square sound holes?
There are different opinions, about the shape of the sound hole. In principle, however, you will find both round and square sound holes and both work fine. The simpler construction is the round sound hole, since the hole is simply drilled to the desired size. In the case of the angular version, the corners must also be adjusted and carved. However the latter is supposed to produce a somewhat more homogeneous sound.
In any case, as with all holes in the flute, the holes should not be drilled too large at the beginning and you slowly approach the desired size. In the case of our flute, the sound hole has dimensions of 5mm x 8mm.
The holes can be drilled with the tip of a knife. If you are skilled, you can also use a stick to widen the hole in a similar way to making a fire with a hand drill.
Drill a hole in front of and behind the wood plug.
Choose between a round and an angular sound hole.
You produce angles in the sound hole by carefully carving them in.
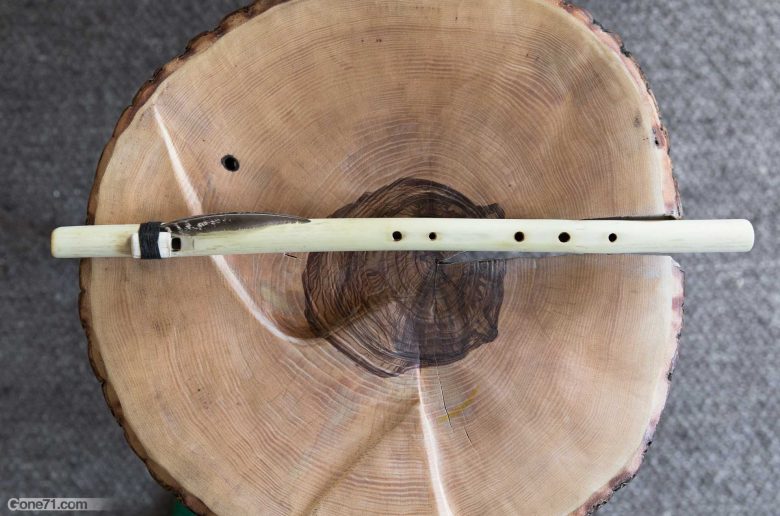
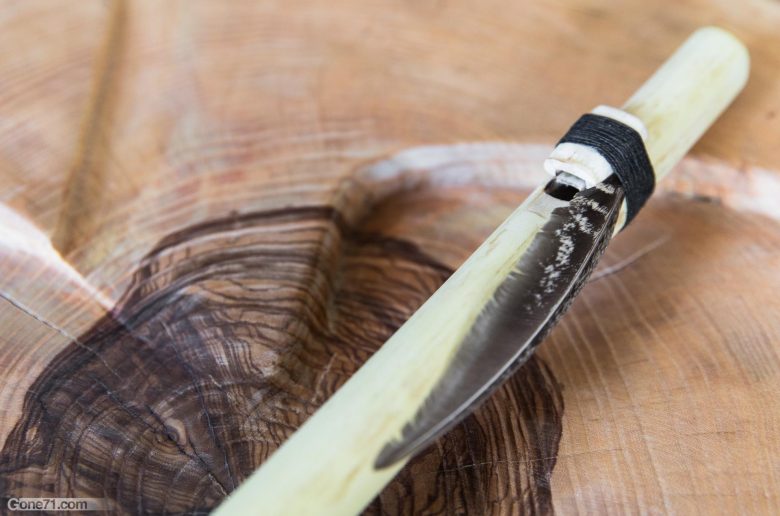
Now only one step is missing until the first sound: the air channel, also called “bird” or “bird blank”. The air channel is carved into a separate piece of wood. To do this, both the underside of the bird blank and the area around the holes (bird seat area) must be absolutely flat so that they close as airtight as possible and you must carefully carve the areas with the knife. The air channel is a notch on the underside of the separate wood piece that allows the air to move from the air chamber thorugh the air hole to the edge of the sound hole. Again, it’s better to start small and slowly enlarge the air channel until it fits.
Carefully bevel the walls of the sound hole so that the “front wall” (side near the air chamber) and the back wall (near the end of the flute) are slightly slanted and thin. If you now place the plate just above the air hole up to the edge of the sound hole and blow into the air chamber, the fundamental note of the flute should sound.
Basically, the longer the sound chamber and the larger the diameter, the deeper the fundamental tone. Since this type of flute construction is based on the native American flute, the “bird” is usually tied with a cord or ribbon. You can take your shoe laces if you do nota have anything else – this is up to your creativity.
The air channel is carved into a separate piece of wood called “bird”.
In the underside of the “bird” is a small air channel that leads from the front wall of the air hole to the front wall of the sound hole.
Both the air channel and the bird seat area of the flute need to be carved plane to be airtight.
The tone that can now be produced is the fundamental tone of the flute. In our case a “G”.
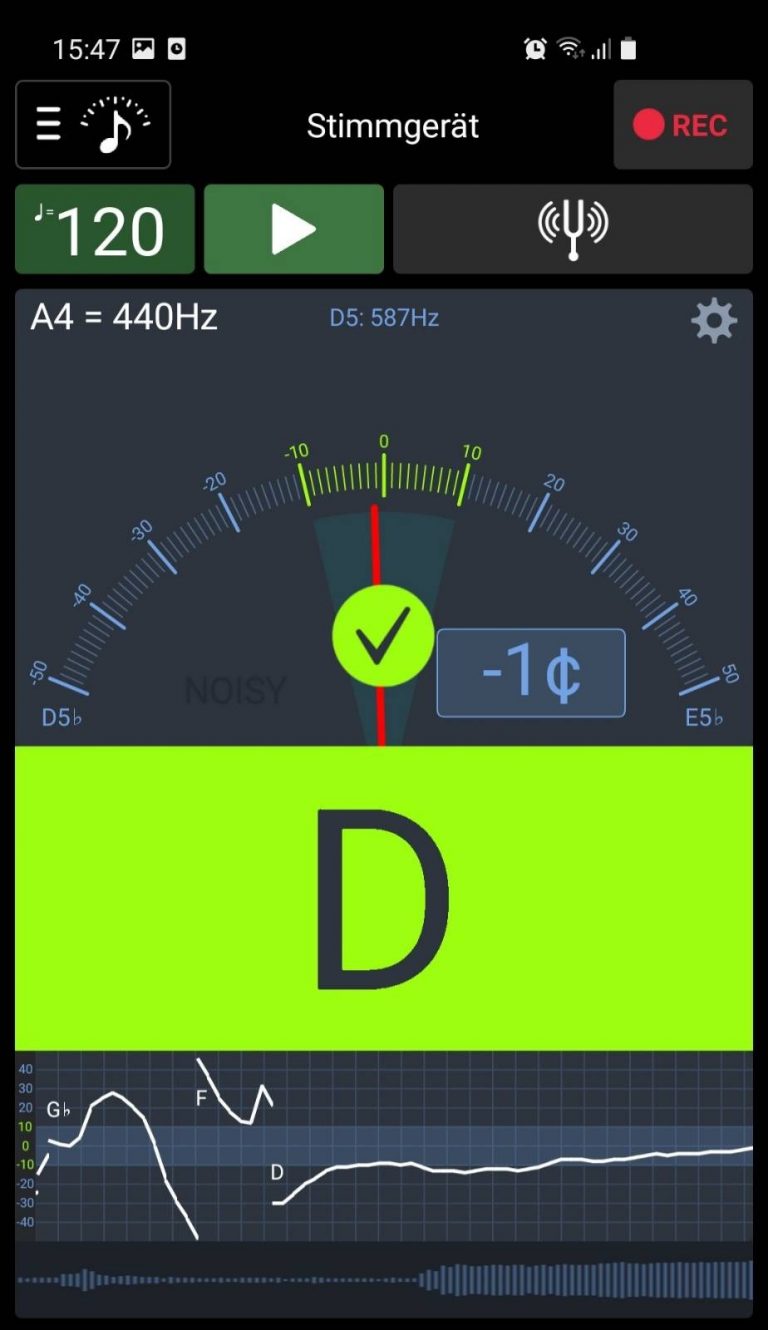
The root tone can now be adjusted upwards. If you are not musically talented and can identify every sound immediately by hearing it, you probably have to use a tuning device. At first I also thought to myself where a non-musical person should own something like that. But after about 1 minute of research, it was clear that there really is a large number of apps and software that allow you to tune your flute using a computer or smartphone. A quick visit to the Appstore helps here in just a few steps. No previous knowledge was required and in principle everything works self-explanatory. You blow into the flute and get the desired information about the sound produced on your display.
There are many apps and programs to tune your flute | Screenshot – Soundcorset
Some basics about notes
The only thing that should be remembered is an overview of the existing notes. So that you know that before a “G” comes an “F” and after the “G” comes an “A”. And that there exist semitones in between.
Cb → C → C# → Db → D → D# → Eb → E → E# → Fb → F → F# → Gb → G → G# → Ab → A → A# → Bb → B → B# → Cb → C …
If you don’t find your way here, it’s not a problem as long as you can read it correctly.
Fine tuning the key of the flute
Our initial measurements of the flute resulted in the root tone “G4”. Actually a bit deeper in “Gb” aka “G flat”. The root tone is the tone your flute is tuned to when all holes are closed (or if there are none). It is basically the deepest tone your flute can produce.
Adjusting the root tone higher is easy. As trivial as it may sound, this is done by shortening, meaning sawing off the flute to the required length. You cut small discs from the end of the flute until the desired sound is produced. But beware, if you cut off too much, the only way to extend the flute is to glue it on.
The root tone is the deepest tone your flute can produce.
The root tone is tuned by adjusting the flute length.
Traditional flutes are very often tuned in F or G.
Maybe you’ll notice it already, but we’ve made a fairly extensive project out of what was initially a simple task, in which we’ve also tackled music theory, which has obviously been neglected in my life for too long 😉 In retrospect, that was a lot more time-consuming than building the flute itself. But hey, I really learned a lot from how such a musical instrument works at all.
So far so good
Whoever has come this far has really already done most of the work. My original goal was also successfully completed. to produce a pleasant tune. I was excited but of course I wanted more now. So how do you drill the holes and where do you place them. Now it gets a bit delicate and you have to make decisions.
Making the tone holes for your flute
The number of holes
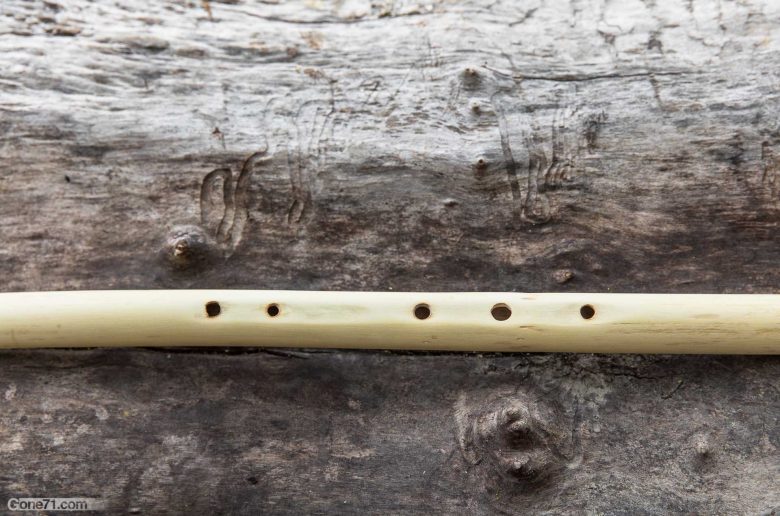
The basic question is how many tone holes you want to drill. I answered this question for myself with a clear 5. These 5 holes cover the minor pentatonic scale traditionally used on Native American flutes. However, some flutes also have 4, 6 or more holes. My research and short experience has shown that 5 holes make a lot of sense, since the often used 6th hole produces a tone that doesn’t really fit in with the sound aesthetic and the hole has to be kept closed most of the time anyway.
For better understanding, I must add that one hole less does not mean that the same notes cannot be played. It’s a question of playing technique. So you can play the same pieces of music no matter if you have a 5 hole or a 6 hole flute.
5 & 6 hole flutes cover the minor pentatonic scale used in traditional flutes of this type
5 or 6 holes depend on personal preferences. For me, 5 holes make more sense.
The number of holes (5 or 6) does not afect the ability to play all the required notes on a flute
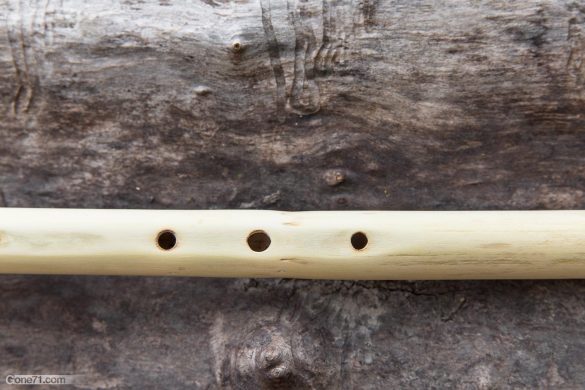
Once this decision has been made, you can pursue the question of how to place the holes. Here, too, there are various options. No matter which one you choose, it is really important here that you drill the holes very small at the beginning and slowly adjust the size. The hole size, together with the positioning on the flute, determines the pitch. If the hole is too big and the tone is too high, the only solution is to glue the hole shut and drill it again. Not a particularly elegant solution.
Method 1 – quick & dirty
A very quick and initially less precise option is to measure the middle between the front side of the true sound hole (TSH) and the end of the flute. Depending on the length of the flute, you then measure 3 cm to 4 cm from this center towards the end of the flute. Our hole 3 is placed here. Our flute has a length of the sound chamber of 40 cm. We have based ourselves on the larger values, meaning the 4cm. If the sound chamber of your flute is shorter e.g. 30 cm, then you should use the 3 cm as a guide. This is a bit of a matter of feeling and not too exact. However you can still adjust the pitch afterwards via the hole size.
From hole 3, again measure 2.5 cm to 3 cm towards the end of the flute. This is where our hole 2 goes. Then measure the same distance to mark hole 1.
For our holes 4 and 5 we return to our center point. From here we measure 1.5 cm to 2.5 cm in the direction of the sound hole for tone and then again this distance for hole 5.
If you want to make a 6 hole flute you simply place an additional hole between our hole Nr. 3 and Nr.4.
App. placement of the tonal holes | total bore length = 40cm
Hole Nr.1 → 10 cm below the measured mid point
Hole Nr.2 → 7 cm below the measured mid point
Hole Nr.3 → 4 cm below the measured mid point
[Hole Nr.4 → we skip this hole]
Hole Nr.5 (4) → 2.5 cm above the measured mid point
Hole Nr.6 (5) → 6 cm above the measured mid point
Method 2 – the sophisticated approach
A much more accurate method is to use a special calculator that you can find online and which is called NAFlutomat. The interface looks very daunting for inexperienced people like me at first glance. Basically, I only entered 3 values and got a passable result.
The app. temperature.
The Inside Bore Diameter
The “key of flute“
adding the TSH (True Sound Hole) paramter will make it even more exact.
After calculating you get a detailed list for where and at what distances you should place the holes on your flute. The hole size is also given here, although I strongly recommend starting as small as possible and approaching it slowly.
Screenshot of "Flutomat" from Flutopedia
As you may recognize you will get the results for 6 holes. That is fine. You simply leave out hole Nr.4 from this list and continue with Nr.5 and then Nr.6. Instead of the proposed hole Nr.4 there will be a gap on your flute and that is ok. You’ll probably learn to understand that this makes sense later on.
Drilling the holes
Once you have placed all your markings on the flute, you can start drilling. As with the air hole and true sound hole, you start carefully with the tip of a knife to make a small hole and then slowly get bigger. You start with hole No.1, with the hole that is closest to the end of the flute and work yourself methodically all the way up. Take out your software or hardware tool for tuning and get to work.
The cleaner the holes, the better the sound and the more accurate the notes. The exact pitch of individual holes depends on the fundamental tone of the flute. Here is a table for orientation:
So for example if your flute is “key G” like mine, hole Nr.1 should be tuned in A# aka “A sharp”. Hole Nr. 2 should be tuned in C and so on. For the 5 hole flute you simply skip hole Nr. 4 from the above table and continue with Nr. 5 as Nr. 4 and Nr. 6 as Nr. 5.
Sound sample of my flute
At this point my music career is 2 days old and I have recorded it on my phone. Please don’t judge me too hard 😉
Final thoughts
Although I was rather skeptical at the beginning that I could develop a really usable flute from my project, I became more and more demanding in my expectations during the flute building and researching process. Above all, understanding how easily the tones can be adjusted through placement and hole size encouraged me to delve a little deeper into the matter.
Once the holes have been drilled and tuned, the flute is basically finished and ready to use. In any case, the harmonious sound captivated me very quickly and although I have no idea about making music or playing the flute, it was fun to play from the start. In the meantime I can even play back simple songs, although I find improvising and pursuing my own style even more exciting.
Tip 1: If not only equipped with a knife, e.g. Use sandpaper or a small file to smooth and adjust the edges of the holes. Tip 2: If the edges of the holes are thicker than 5mm, it makes sense to carve them out or grind them in. Tip 3: If a hole accidentally gets too big, you can only fix it by gluing it shut and drilling it again. Super glue and sawdust are very suitable for this. In the great outdoors, of course, this is rather difficult. Tip 4: Holes should ideally have a diameter between 5mm and 9mm. Of course, that also depends on the nature of your own fingers. Some people can handle larger holes. If you have to make a hole that is too big when tuning, you can instead grind the “front wall” from the inside to adjust the pitch. Tip 5: The pitch can also be slightly varied via the intensity with which the air is blown in. Each hole has a “sweet spot” where the tone is hit particularly well. However, you have to vary between the individual holes.